Party

You can form a Party and go on adventures with companions.
1. Creating a Party
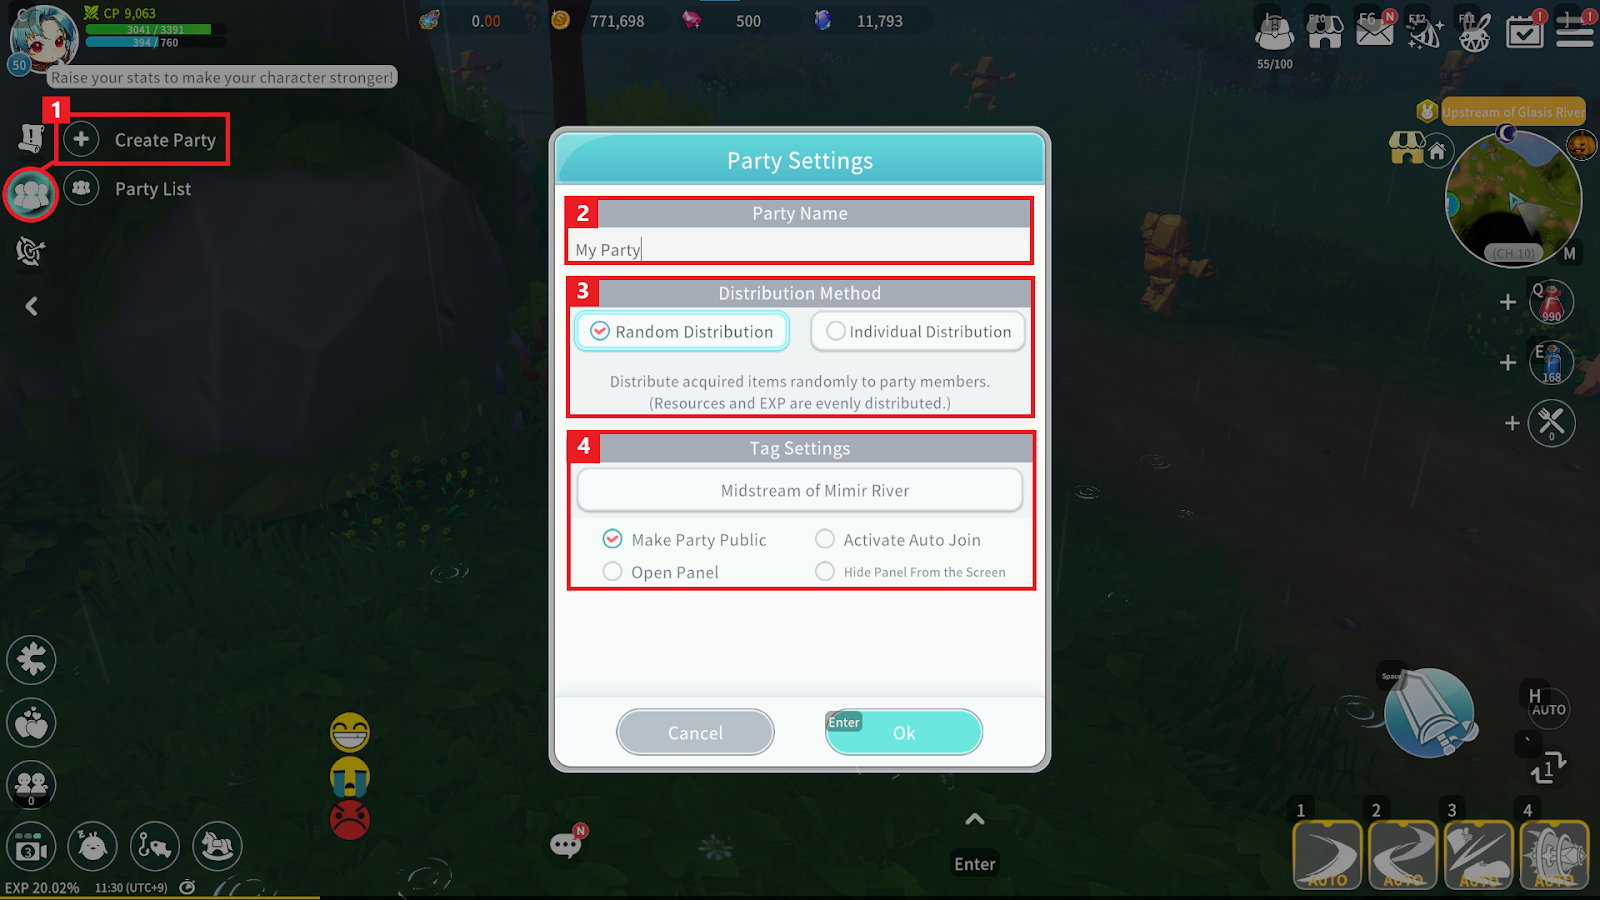
① Press the “Create Party” button to open the Party settings window.
② You can set the Party name.
③ You can set the loot distribution method. Cegel and Experience are distributed equally.
- Random Distribution: Items are randomly acquired by one Party Member located in the same area.
- Individual Distribution: The Party Member who lands the final hit on the Bale obtains all items.
④ You can set Party Tags. Tags can indicate Field or Dungeon activities, allowing Adventurers to understand the Party’s objective area.
If “Make Party Public” is unchecked, the Party will not appear in the Party List and can only be joined via invitation.
2. Party List
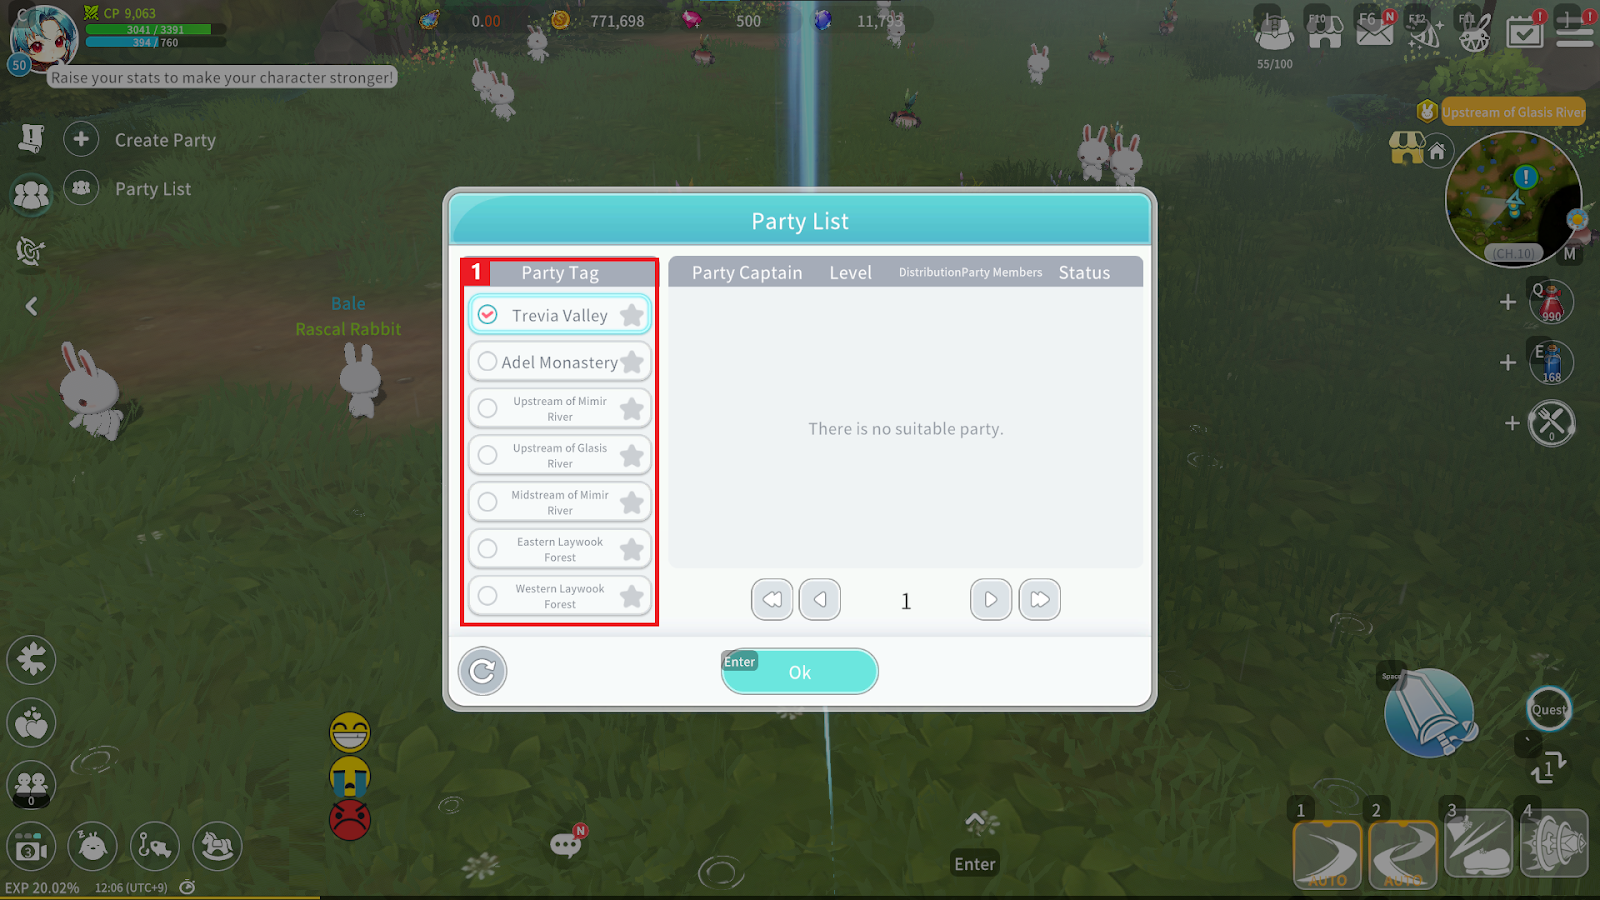
① Select the desired Tag in the Party List to find available Parties.
- Once you find a Party you wish to join, press the “Join” button to apply.
- The Party Leader can check applicants through the Join Request List.
- The Party Leader can accept or reject applicants.
3. Party Management
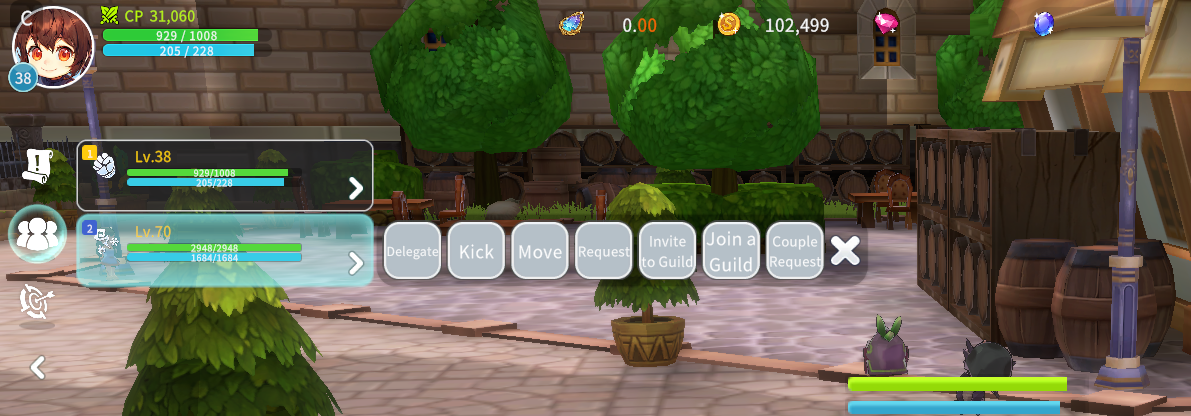
When selecting another member’s Party window, you can delegate Party Leadership, kick members, send Friend Requests, or move to a Party Member.
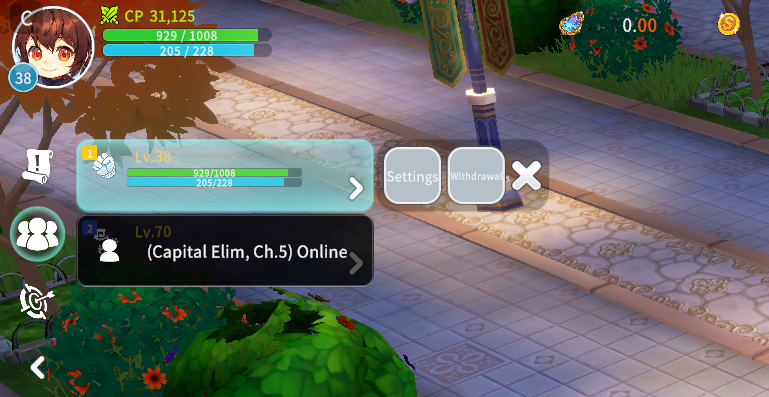
When selecting your own Party window, you can leave the Party or modify Party settings.
4. Marking and Ping Features
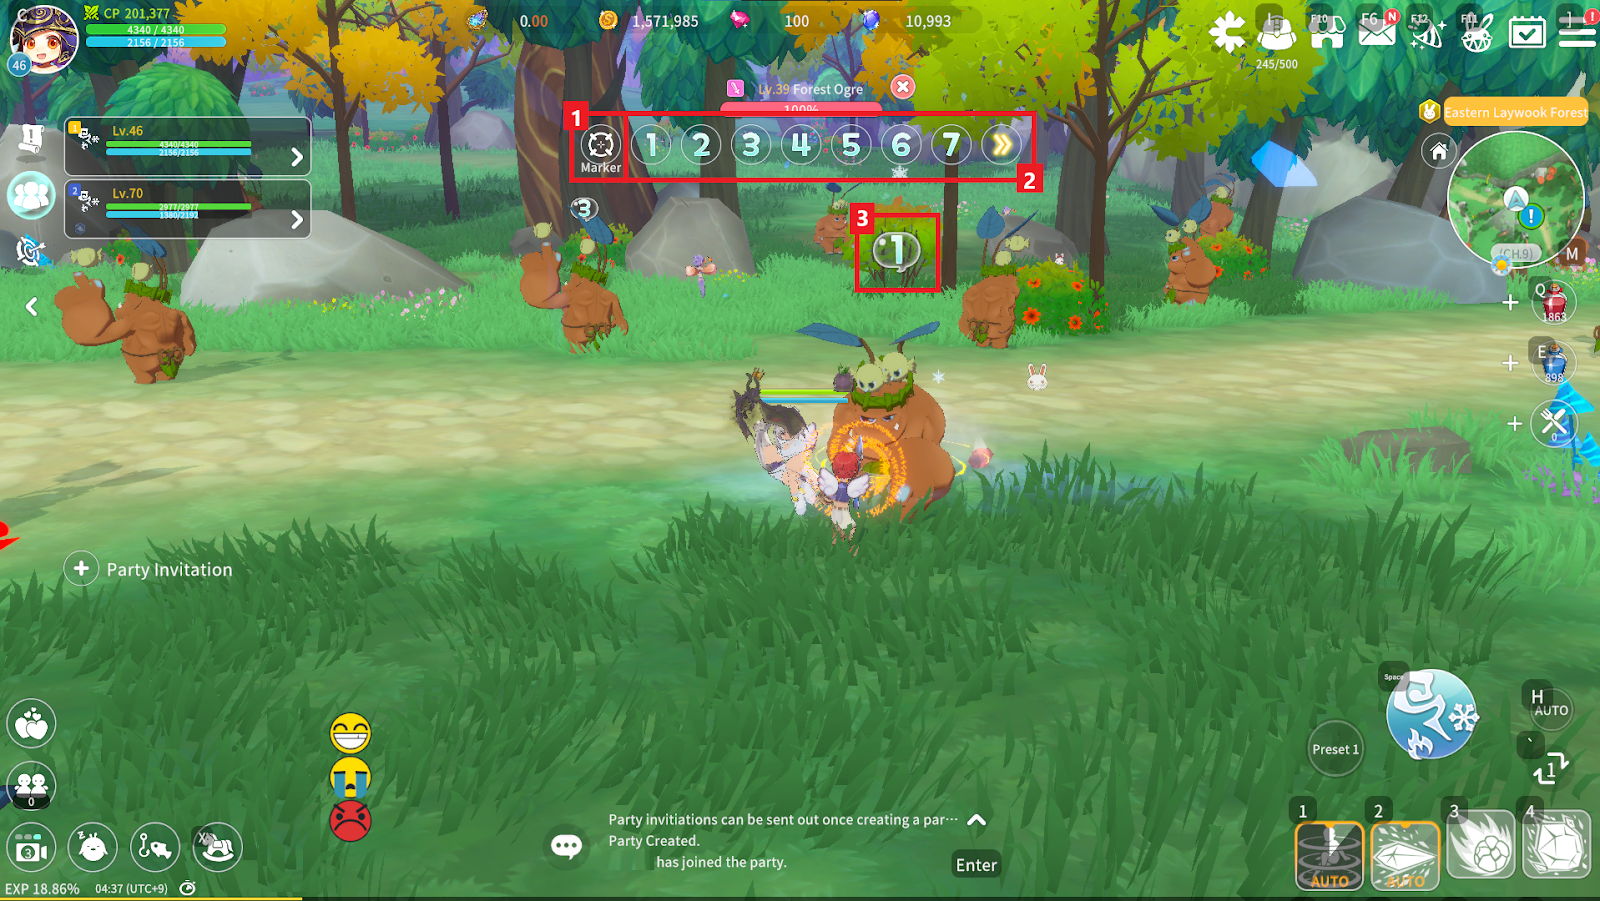
① While in a Party, you can use the Marking feature to place a marker on a specific Bale or character.
② You can select the type of marker to apply to the target.
③ The applied marker will appear above the target.
- To remove a marker, select the marked target and tap the same marker again.
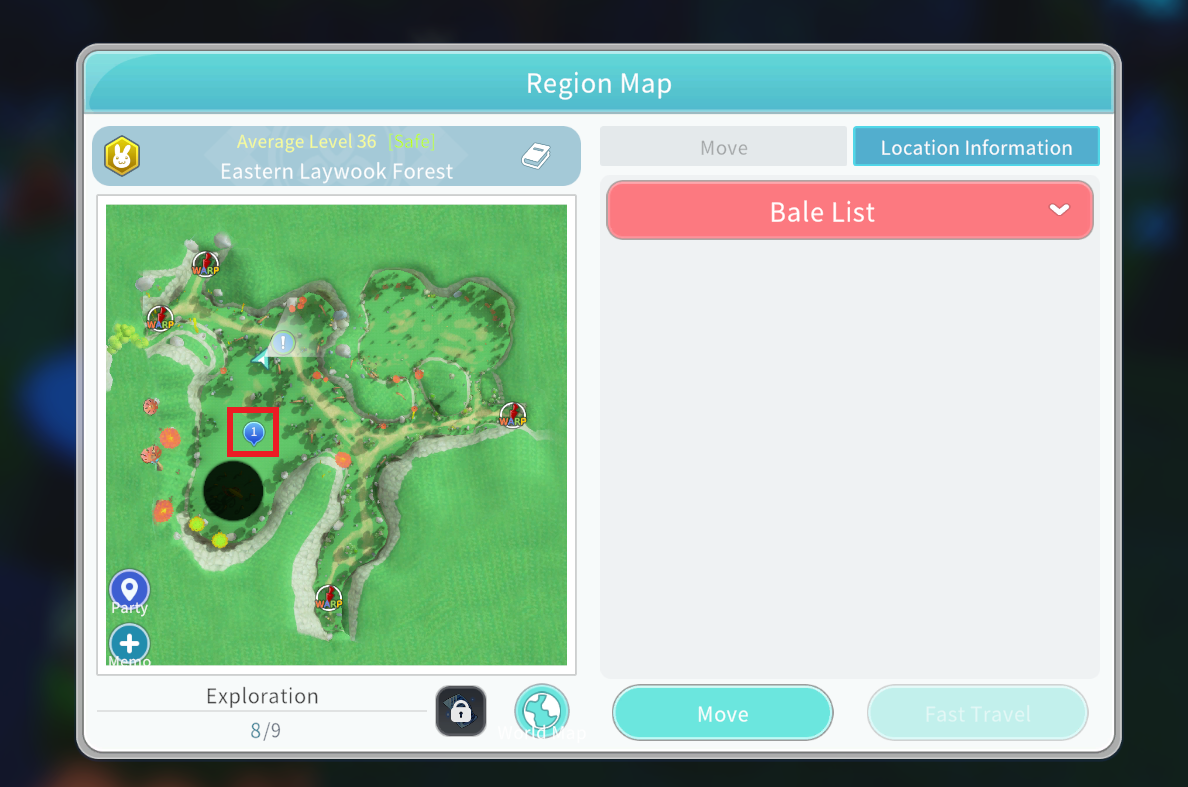
While in a Party, you can place a Ping on a specific location on the Area Map.
- Tap the desired location on the Area Map to use the Ping feature.
- Tap the Ping location again to remove it.
- Applied Pings can be checked on both the Area Map and the Mini Map.
